Pages

Friday, February 24, 2017

Arugula Pesto Farfalle with Chicken

This is an easy recipe that is great for a quick weeknight meal or even for a party. Pesto pasta is nothing new, but I just found this dish enticing when I saw it on The Chew show.

I totally forgot to get golden raisins, but I didn't miss them or think the dish suffered.
Note: Meyer lemon is not in the recipe but I used it to marinate my chicken thighs

The Chicken
To keep this recipe quick and easy, the boneless, skinless chicken is cooked with a very basic preparation. I decided to marinate the chicken thighs in extra virgin olive oil (enough to coat) and the juice and zest of half a Meyer lemon. I let it sit for a short amount of time while I made the pesto and got the water boiling for the pasta. It came out tender and juicy.

The Pesto
Using arugula is a nice change up to basil and makes for a nice pesto because arugula has a spicy bite. Walnuts are not my favorite nut, but I wouldn't actually mind a little more to taste them in this pesto, say 1/3 cup. As a personal preference, I'd use less extra virgin olive oil next time (1/2 to 2/3 cup) to reduce any oiliness or separation.
 

The recipe makes plenty of pesto to coat a pound of farfalle very well.

Finishing the dish with dollops of ricotta cheese is a nice option. If you don't have ricotta, I also don't think the dish would suffer since there's Parmigiano-Reggiano in the pesto. In trying to cut out some fat, I used fat-free ricotta...wah wah. :o( I definitely miss the creaminess of whole milk ricotta or even reduced-fat. I only used 3 heaping tablespoons of ricotta instead of 3/4 cup that the recipe lists. However much ricotta you use, I suggest seasoning the ricotta with salt before topping it on the pasta so that the ricotta's also flavorful.

This is a tasty dish and I would definitely make it again. I had some arugula left over from a 7 oz. bag and used some for garnish as well (see above).

My Rating (out of 5): 4


Thursday, February 23, 2017

Ikinari Steak's First U.S. Outpost

Ikinari Steak is a hit Japanese chain that brought high-quality steak to fast casual dining. They don't even have seats. The concept brings quality steak at a reasonable price in a fast, efficient manner. And they opened their first U.S. location today in NYC's East Village (with plans to open more in Manhattan).

I don't remember much buzz about this opening and heard about it just a few days before with press releases and promotion. And I was intrigued enough to make a visit for lunch...on opening day.

Because New Yorkers are obsessed with being one of the first to try new restaurants, I expected a line to be down the street on opening day. So I was very surprised there wasn't one when I arrived around 11:50 a.m. (They opened at 11.) There was a bunch of press standing around outside that I didn't think they were open to the public. Inside, there were mostly press people with video cameras standing around blocking and ignoring waitresses that were trying to bring food to customers. I was quickly reminded why I normally don't check out places on opening day. There were only few actual customers when I arrived, but more customers started to stroll in by the time I left.

The restaurant chain has a standing-only model. But at the East Village location, they did include 10 seats. From a quick look around, it looks like two 4-top tables and one 2-top table. The rest are standing stations.

The menu is small with 3 cuts of 40-day wet-aged beef by weight and 1 lunch special, a few sides, and a few drinks including beer and wine. There is no chicken or fish and I'm not sure if they will add any since its a steakhouse. There are no appetizers or desserts. This helps with a fast and efficient dining experience. Everything comes out when it's ready rather than being spread out.

Current prices are 9 cents/gram for rib eye, 8 cents/gram for sirloin, and 11 cents/gram for filet. There are minimum weight orders for the steaks to keep them thick. So rib eye starts at 300g/10.6 oz. ($27), sirloin at 200g/7.1 oz. ($16), and filet at 200g/7.1 oz. ($22).

The steaks are freshly cut and weighed in front of you. The restaurant chain calls this "Japan cut" or "J-steak". The wet-age beef are sourced from a company based in Illinois that’s also used in Japan.

All steaks come with corn but you can substitute it for a different garnish like potatoes, green beans, onions, or broccoli. If you want more than one garnish, it costs extra. The waitress nor the kitchen chef asked what garnish I wanted, so make sure to ask if you want something else. So, I didn't realize my steak came with corn until I got my steak. And, I discovered after my visit that you can ask for something else thanks to this Yelp photo.

At lunch, they also offer a Wild Chuck-eye Steak special with soup, salad and rice for $20. It is not available for order by weight. Media reports say the chuck-eye is 14 oz. But the lunch menu and website lists 300g (or 10.6 oz).
 
Lunch menu (l); Dinner menu (r)

How it works (based on my visit):
- When you arrive, an employee shows/directs you to a numbered standing station (or a table if you prefer seat which you probably need to request)
- Menus are already at the standing station. A waiter will come over to take your order for drinks and sides only, bring water, and bring a paper apron.
- Then, the waiter will walk or direct you to the back kitchen counter to order your meat. You order the cut of beef and amount that you want and they cut and weigh it in front of you. Bring the number card for your station/table so the kitchen knows the right place to send your steak (and because you probably won't remember your number).

Even if you order the chuck-eye lunch special, you still have to go tell the kitchen counter your order. But you don't see it get cut. A little odd, but I guess this is to make the process consistent for the staff.
- After you order your steak, you go back to your station and your food is brought out to you
- Forks, knives, napkins & condiments are already at your station. There were no spoons.
- A bill is brought to you when your steak is delivered. Keep it so you can pay at the front desk when you leave.

I had the $20 chuck-eye steak lunch special because it's a good deal. The soup and salad are very small and basic, but it's nice that rice is also included. The soup was a small mug of beef or chicken broth with a few bits of carrot, celery and beef that you drink since there were no spoons. The salad was a small handful of lettuce and a few shredded carrots. The onion and pepper dressings were good but nothing special.
Salad & small cup of soup with chuck-eye lunch special

My chuck-eye came out sliced on a sizzling platter with the garnish of corn. The chuck-eye already had nice color from cooking over a fire but was still blue rare on the inside. There's a printed guide on the menu on how to enjoy your steak, and they suggest rare. But if you want a different temperature, you just leave the steak on the hot plate to cook longer.

I usually prefer my steak medium or medium rare, but I went rare this time. My chuck-eye was very tender, juicy, and flavorful from the fat and seasoning. Chuck-eye is not the same as chuck steak. Chuck-eye is cut from a different part of the rib than rib eye. So chuck-eye still has a lot of good flavor but costs less than rib eye.

The house hot steak sauce, dubbed J-Sauce, was delicious without covering up the flavor of the steak. It's their own soy-based steak sauce. Not sure if the steak sauce is hot because it's warm and kept in a thermos, or also spicy. If there is spice, I didn't really taste it. But having warm sauce is perfect to help keep the steak warm.

There's also Ikinari sauce that is a sweet sauce. I asked what's in the sauce, but the employee who brought out my steak didn't know. My waitress just said it was sweet. It's also tasty but I preferred the house steak sauce.

Other than the steak sauce, I didn't use any of the other condiments because I didn't need them.

My steak also had a small dollop of what they call a garlic paste. It looked and tasted like some type of butter or mayo, but I didn't taste much garlic. And it looks very different than the garlic available in the condiments.

They are a non-tipping restaurant. I walked out full and happy from chuck-eye steak lunch for $21.78 after tax.

About that paper apron...it's a good idea to help keep any grease splatter from the sizzling hot plate from getting on your clothes.

The standing stations have lots of storage. A shelf where you can place menus after ordering or to store items, a hook to hang a coat or bags, and even foldable stands on the floor that can  hold briefcases or bags.

The kitchen is open so you do walk out smelling smokey like hibachi or K-BBQ places.

The restroom has a fancy Japanese toilet with a heated seat, washing & dryer options. There's also Listerine if you want to be minty fresh. [toilet pic]

And if you're so inclined, they have a Niku mileage membership card that you can sign up for to track the weight of meat you eat. The card comes complete with Lady Liberty and has rewards after consuming a certain amount of beef.

I was done in 35 min., and I didn't scarf down my food or feel rushed. Maybe this might be different when it's busy.

Some people are already taking criticizing the fast concept as not being fine dining, only appealing to the college crowd, or rushing people to make money. I think this is snobby and out of touch. Full-service, upscale restaurants are having to close or forced to move due to rent hikes and increasing costs, so I think it's close-minded to criticize a business for creating new ways to bring good food to people and stay in business to keep serving good food to customers.

I enjoy a nice steak dinner at a high-end, full-service steakhouse. But that's usually for special occasions. I love steak, so I welcome a concept that can make quality steaks accessible without a special occasion and for a modest price. I don't always want to have a 3-course meal that stretches on for a couple of hours just to have a good steak. And I'm more interested in getting quality food at a good price than having white cloth tables and a fine dining ambience.

I'll be back to try other cuts. Definitely recommend trying this place for quality steak at reasonable prices.

My Rating (out of 5):  5

Ikinari Steak
90 E. 10th St.
New York, NY 10003

Friday, February 17, 2017

Brussels Sprouts Salad with Citrus Vinaigrette

After eating a lot of bread carbs over the last week, I was in desperate need of some healthy eats. I found this raw Brussels sprouts salad by The Real Food Dietitians and was excited by the ingredients.

Full disclosure: I made some substitutions to use what I had at home but I don't think they drastically changed the flavors or result of the salad.

This recipe makes a hella ton of salad and is good for a large group of people or a party. I made the full recipe and had a lot leftover. And Brussels sprouts are a hearty vegetable with plenty of chew compared to arugula or spinach. If you want to make a smaller amount for 4 people or less, I suggest cutting the ingredient amounts by half.

I highly recommend buying a bag of shredded Brussels sprouts. I think it's really worth it in this case. (Thank you, Trader Joe's!) Since Brussels sprouts are small, shredding them yourself can be time consuming and I don't love that my food processor leaves small chunks behind with the shredder attachment.

I had turkey bacon in the fridge and used that instead. I cut up the turkey bacon into small strips so they got evenly crispy in the oven. Since the bacon will start to get soft once the salad and dressing are mixed, I cooked the bacon until it was very crispy.

For the dried cherries, I also recommend using tart cherries if you can get them. I think they add a nice balance to the bacon and Brussels sprouts. Trader Joe's had three dried cherry options to choose from including tart Montmorency cherries.

I love pecans and already had some. I also think they go great with dried fruit. So, I used rough-chopped pecan halves instead of almonds.
Clockwise: red onions, turkey bacon, pecans, dried tart cherries
(shredded Brussels sprouts underneath)

The recipe calls for 1 cup of sliced red onions and I thought it was a little to much. While I like red onions, I would cut back to 1/2 to 3/4 cup the next time I make this. And to take out some of the bite, soak the sliced onion in cold water while the bacon cooks. Then, drain and pat dry with paper towels when ready to add to the salad.

For the citrus vinaigrette, I used an average sized naval orange and am guessing that it had a little more juice than a small orange that the recipe calls for. I used a Meyer lemon instead of the regular lemon variety since they are in season. I also added about a 1/2 teaspoon of lemon zest because why waste it?
Vinaigrette ingredients

The vinaigrette recipe calls for 3/4 cup of olive oil, but I only used 1/2 cup. I could taste the extra virgin olive oil in the dressing and didn't want it to get too oily or overpowered by an olive flavor. Last, I used Dijon mustard since I didn't have any yellow mustard. I ended up with exactly 1 cup of vinaigrette after my modifications. I thought the dressing was good, but I think I prefer an all-lemon dressing for more tang and brightness to the salad. And I'd leave out the shallots, since the salad already has a lot of red onion, and use garlic instead.

I skipped the optional goat cheese to be healthier, but I may include it another time.

I thought there's a good ratio of bacon, nuts, and cherries in each bite. There's very little chopping involved in this salad, especially if you get pre-shredded Brussels sprouts. The vinaigrette is the most complicated part of the recipe! I'll definitely make this again.

My Rating (out of 5): 4

11.6.2017 Update: Decided to add my recipe version below which makes a smaller amount.

Brussels Sprouts Salad with Citrus Vinaigrette Recipe

Prep time: 15 mins
Cook time: 12 mins
Total time: 20 mins
Yield: 4 - 6 servings

Ingredients
Salad Ingredients:
  • 4 slices of turkey bacon
  • 1/2 cup thinly sliced red onion 
  • 10 oz. package of shredded or shaved Brussels sprouts
  • 1/3 cup dried tart cherries, unsweetened (such as Montmorency cherries)
  • 1/3 cup pecan halves, toasted and rough chopped
Vinaigrette Ingredients:
  • 1/2 small orange, juiced
  • 1/2 tsp. orange zest
  • 1/2 Meyer lemon, juiced (regular lemon can be substituted)
  • 1/2 tsp. lemon zest
  • 1 small garlic clove, grated
  • 1/2 tsp. Dijon mustard
  • 1 tsp. dried thyme, minced
  • 1/4 cup olive oil 
  • Kosher salt and black pepper 

Instructions
Preheat the oven to 400 degrees F.

Chop the uncooked turkey bacon in to small splices. Spread pieces in a single layer on a foil-lined baking sheet. Spread pecan halves on a separate small baking sheet. Place both baking sheets in the oven on a rack placed in the middle. Toast the pecans for 3-5 minutes, making sure to watch that they don't burn. Cook the bacon for 12 minutes, until very crispy.

When the pecans are toasted, let cool. Then, roughly chop the pecans and set aside.

While the bacon is cooking, slice the red onion and soak in a bowl with cold water. This helps remove some of the bite.

While the bacon is cooking, also make the vinaigrette. Whisk all of the vinaigrette ingredients, except the olive oil, together in a small bowl. Drizzle the olive oil in a slow stream while constantly whisking to emulsify the vinaigrette. Season with salt and freshly ground black pepper to taste. Set aside.

Once the bacon is cooked, set bacon on paper towels to drain excess grease. Also drain the red onions and pat dry with paper towels.

Combine the Brussels sprouts in a large bowl with turkey bacon, red onion, cherries, and pecans.

Add 1/2 cup of the vinaigrette immediately before serving and toss to coat well. Season with salt and fresh ground black pepper as needed.


Silky Cauliflower Soup

I was in the mood for some healthier food when Smitten Kitchen posted a silky cauliflower soup that she likes to make. The recipe is by Dave Lieberman, and since Deb gave it an endorsement, I gave it a try.

What the recipe has going for it is that it's super easy to make, has only a few ingredients, and I thought the texture had a nice silky feel like the name describes. I also like that there isn't cream or whole milk which keeps the soup light. It's a nice option for lunch or dinner when you don't have a lot of time and you likely have most of the ingredients at home. But with the simple ingredients, the flavors are straight forward and aren't going to have a big wow factor.

(Note, I didn't make the Parmesan crisps mentioned in the recipe.)
After the cauliflower cooked through

I used Parmigiano-Reggiano cheese, which has strong flavor, and regular chicken stock instead of a low-sodium version. While the cauliflower and cheese flavors come through, the soup can be one-note without other ingredients to build more flavor. Some reviews called the soup bland. But when I think of bland, I think a dish may need more seasoning with salt and pepper. This recipe doesn't specify an amount of salt and pepper so I added enough to suit my taste.
Soup blended to silky texture with grated Parmigiano-Reggiano

The soup could benefit from more flavors by adding celery, using leeks, or adding cayenne. But it's not a terrible option if you need to make something in a jif.  I also made raw Brussels sprouts salad to serve with this soup which you can find out more about here.

My Rating (out of 5): 3

Thursday, January 26, 2017

Healthy New Year's Smoothie by PureWow

With every new year, there's always tons of articles and recipes on how to get healthier. This PureWow recipe for a clean, green smoothie is one of them this year.


The ingredients are simple and easy to find. There's no dairy, nut butters, or other thickeners. No trendy ingredients or added sweeteners. I definitely give it points for being clean.

I thought the naval orange and banana provide enough sweetness. But if you have a sweet tooth, honey or agave can be added.

PureWow says to use a clove of ginger, but I haven't heard of the term "clove" used before in describing a measurement of ginger. So, I'd go with a 1- or 2-inch piece of peeled ginger based on your preference.

Since I used an English cucumber, I only used 1/3 or 1/2 of it since it's longer than regular cucumbers.

I made this a few more times to use up the rest of the spinach and added 1/4 teaspoon of ground turmeric for added health benefits.

There's no frozen ingredients or ice, so the smoothie's consistency is not thick.

Overall, I thought it tasted good. The flavors aren't going to wow you but you most likely have all the ingredients on hand.

My Rating (out of 5): 3


Trader Joe's Pretzel Stick

I recently came across a light-hearted article that listed the top favorite items at Trader Joe's in 2016, or something like that. The Pretzel Stick made the list and I decided to try it.

While it has the color and skin of a pretzel, that's about all that I liked about it. It's a small baguette shape less than 12" long so it could be a snack or used for a sub sandwich. But I didn't like the texture of the bread inside. Since it's a pretzel stick, I wanted the dough to have a little chewiness like a pretzel has. But it was just crumbly, on the dry side, and didn't have much flavor.

I was never a big bread eater because I didn't like the texture of many grocery store products. Either they are too soft and gummy, or dry and flavorless. Unfortunately, the Pretzel Stick falls into that same group for me.

My Rating (out of 5): 2

Friday, November 25, 2016

Thanksgiving Puploaf Recipe

I enjoy cooking for my dog for special occasions. I particularly like making something special on Thanksgiving so he has his own dog-friendly dinner. Turkey meatloaf is a great option since it can be made into fun shapes. I've made a drumstick in the past, and this year, I tried making a tiny turkey. I was so pleased that the little legs stayed on and I think it turned out cute!

Thanksgiving Doggie Dinner: Turkey-shaped meatloaf w/ gravy, blanched green beans, baked butternut squash

I like to use Tuscan kale (a.k.a. dinosaur or Lacinato kale). The leaves don't have curly edges so they won't stick out of the meatloaves like curly kale can. Plus, kale has great nutritional benefits.

Adding turmeric also provides many health benefits such as anti-inflammatory, detox, and many other properties.

While I made this for Thanksgiving, this recipe is good for other special occasions and holidays or even year-round. And you can play around with the ingredients to change up the herbs & veggies that are dog-safe.

Thanksgiving Puploaf Recipe

Prep time: 10 mins
Cook time: 30 to 40 mins
Total time: 40 to 50 mins
Yield: 4 loaves

Always check with your vet about which foods are appropriate for your pet and any pre-existing condition, medication, or planned surgery affecting your pet.

This recipe does NOT contain all the nutrients necessary for complete nutritional health and is NOT intended as a dog's regular diet. This recipe is for special occasions

Ingredients
1 lb ground turkey
1/2 cup cooked quinoa
1/2 cup Tuscan kale, stemmed & finely chopped
1 small carrot, shredded
1 celery stalk, finely diced
1/4 cup flat leaf parsley, chopped
1 sprig of sage, stemmed & chopped
2 sprigs of rosemary, stemmed & finely chopped
2 tablespoons parmigiano-reggiano cheese, grated
1 or 2 large eggs, beaten
2 tsp. ground turmeric

Directions

Preheat oven to 350 degrees F.

Cook quinoa according to package instructions but do NOT add salt since this is for dogs. Make enough to yield 1/2 cup cooked quinoa. (Use any extra quinoa as a mix-in with your dog's regular food.) Allow the quinoa to cool slightly.

In a large bowl, combine the ground turkey, cooked quinoa, kale, carrot, celery, parsley, sage, rosemary, cheese, 1 beaten egg, and turmeric. Mix lightly with a fork. Don't mash or the meatloaf will end up dense. If the mixture isn't holding together, add another beaten egg.

Divide the mixture and form into 4 small loaves. You can make larger loaves depending on the size & normal feeding portion for your dog. Place loaves on a rimmed sheet pan lined with parchment paper or aluminum foil. Bake for 30-40 minutes, until the internal temperature is 165 degrees F and the meatloaves are cooked through. (Larger loaves will take longer to cook.) Remove from oven and let rest for about 10 minutes before serving.

Refrigerate or freeze any leftover meatloaves.

NOTE: This recipe can be made as meatballs instead by forming 1-inch balls and baking in 400 degrees F for 15 minutes or until cooked through.


Twice-Baked Butternut Squash with Parmesan Cream and Candied Bacon

I made this Epicurious recipe for Thanksgiving and I think this is going on the menu every year. The candied bacon hazelnut bits are EVERYTHING! You'll want to put it on other things too.

I usually shy away from recipes with multiple components and techniques, especially for Thanksgiving. Some of the techniques I've never attempted before at home...also not a good idea for Thanksgiving. But, this recipe just appealed to me and it's the holidays after all.

The dish wouldn't be the same without the candied bacon-hazelnut. Unless you hate hazelnuts, I wouldn't substitute with another nut. Hazelnuts are what make the candied bits delicious.
Melting sugar from this...
to this.
Cooled candied bacon-hazelnut

All of my squashes were done roasting within 40-60 min, so check on them periodically so they don't get too soft. It's important for the large squash to keep its shape especially after you scoop out the flesh to make shells. You can see where one half of my large squash cracked/split

Also, my large squash gave up a good amount of liquid. This made my filling a little too wet and it leaked around the edges of the shells. So, start with less cream when mixing the filling and add more cream as needed depending on how much liquid your squashes have.
Combining filling ingredients (excluding chives)
Mixed filling with chives

I used Parmigiano-Reggiano which has strong flavor. But another type of Parmesan can save a bit of money.
Ready for a second bake

The only issue I had was with the whipped cream. I made the cream & cheese mixture the day before and chilled overnight so I could save time on Thanksgiving. The mixture was thick when I took it out on Thanksgiving to whip. It quickly overwhipped at medium-high speed and I didn't have any heavy cream left to try to save it. I didn't want to waste it, so I used it as a "butter" topping and dotted pieces of it on the tops with the bacon & hazelnuts.
Whipped cream mixture after overnight refrigeration

This is an indulgent dish with all the cream and cheese but great for dinner parties, holidays or special occasions. There aren't any special ingredients but it looks impressive!

My Rating (out of 5): 5

Twice-Baked Butternut Squash with Parmesan Cream and Candied Bacon
Source: Epicurious

Yield: Serves 6-8
Active time: 45 mins
Total time: 2 hours, 10 mins

Ingredients
  • 1 large (about 5 pounds) and 1 medium (about 3 1/2 pounds) butternut squash
  • 2 cups heavy whipping cream, divided
  • 1 cup finely grated Parmesan (about 3 ounces), divided
  • 3 strips bacon (about 3 ounces)
  • 4 tablespoons sugar, divided
  • 2 tablespoons finely chopped hazelnuts
  • 1 1/4 teaspoons kosher salt
  • 3/4 teaspoon freshly ground black pepper
  • 1/4 teaspoon freshly grated nutmeg
  • 3 tablespoons chopped chives, divided

Preparation
Preheat oven to 400°F. Cut both squash in half lengthwise; scoop out seeds. Transfer cut side down to a parchment-lined rimmed baking sheet. Poke outside of skin all over with a fork, then roast until flesh is very soft, about 1 1/2 hours for large squash and about 1 hour for medium squash.

Meanwhile, heat 1 cup cream in a medium pot over medium until just beginning to simmer. Reduce heat to medium-low and whisk in 1/4 cup cheese and cook, whisking, until smooth, about 1 minute. Transfer to a medium bowl and chill until very cold, about 45 minutes (do not freeze).

Cook bacon in a medium skillet over medium heat, turning occasionally, until crisp, 8–10 minutes. Transfer to paper towels, reserving bacon fat in skillet. Let cool, then finely chop.

Spread 3 Tbsp. sugar in a thin layer in the center of a medium dry skillet. Cook over medium heat, mostly undisturbed (it's ok to swirl pan gently to get sugar to melt evenly), until sugar melts and starts to turn light brown, about 6 minutes. Quickly stir in bacon and hazelnuts and cook, stirring, until coated and melted sugar is chestnut brown, about 1 minute more. Scrape onto a parchment-lined rimmed baking sheet and spread out to cool, then finely chop.

Reduce oven temperature to 375°F. Using a spoon, scoop flesh out of large squash into a large bowl, leaving a 1/2" border around squash shell to help maintain its shape. Transfer large shells to a rimmed baking sheet; arrange a few pieces of crumpled foil around shells to keep them upright. Scoop flesh out of medium shells into same bowl (you should have 6 cups squash); discard medium shells. Using a potato masher or spatula, mix in salt, pepper, nutmeg, 1 Tbsp. reserved bacon fat, and remaining 1 cup cream, 3/4 cup cheese, and 1 Tbsp. sugar until smooth. Fold in 2 Tbsp. chives. Divide filling between large squash shells, then create attractive swoops with a spoon. Bake squash until warmed through, 20–30 minutes.

Meanwhile, using an electric mixer on medium-high speed or a whisk, whip chilled cream to medium peaks. Chill until ready to use.

Dollop squash with whipped cream, then top with candied bacon bits and remaining 1 Tbsp. chives. Serve extra candied hazelnut-bacon bits on the side.

Do Ahead
Squash shells can be filled (not baked) 2 days ahead; cover and chill.

Green Bean Casserole Recipe

Green bean casserole is a staple for my Thanksgiving table. Growing up, my family made this using a recipe from the side of a can of Durkee (now French's) fried onions that included canned cream of mushroom soup and canned green beans. To make it fancy, we'd use canned French-cut green beans. The beans were a bit mushy, but I loved it and never made it any other way.

When I was planning for Thanksgiving a few years ago, I came across a green bean casserole recipe that made all the components from scratch. I hadn't planned on using a new recipe but decided to try it. While I didn't do everything from scratch, it was delicious and pretty easy. I've been making it from fresh ingredients since (except the fried onions).

I still like to use store bought fried onions because I really don't like frying. I use French's Crispy Fried Onions (original flavor) or Trader Joe's Gourmet Fried Onion Pieces. I was told by a Trader Joe's employee once that this item is seasonal and they have it in the fall around Thanksgiving. But I can always find French's at the grocery store year round.

I also prefer using haricot verts because they are more tender, thin, and less stringy, but of course regular green beans can be used.

While I'm nostalgic about the recipe from my childhood, this recipe is now my go to for this casserole. Having just made this for this year's Thanksgiving, I decided to write up the recipe.

Green Been Casserole Recipe

Prep time: 10 mins
Cook time: 40 mins
Total time: 50 mins
Yield: 4 - 6 servings

Ingredients
  • 2 tablespoons plus 1 teaspoon kosher salt, divided
  • 1 pound fresh haricot verts, trimmed and halved
  • 2 tablespoons unsalted butter
  • 1 package of cremini mushrooms (10 or 12 oz.), cleaned and thickly sliced
  • 1/2 teaspoon freshly ground black pepper
  • 2 cloves garlic, minced
  • 1/4 teaspoon freshly ground nutmeg
  • 2 tablespoons all-purpose flour
  • 1 cup chicken broth or stock
  • 1 cup half-and-half
  • 1 1/3 cup store-bought fried onions, divided in half
Directions
Preheat the oven to 400 degrees F.

Bring a large pot of water to a boil with 2 tablespoons of salt while you prepare the other ingredients.

Blanch the haricot verts for 2-3 minutes until crisp tender. Drain and immediately plunge the beans into a large bowl of ice water to stop the cooking. Drain again and set aside.

Melt the butter in a sauté pan over medium-high heat. Add the mushrooms, 1 teaspoon of salt and the pepper and cook, stirring occasionally, until the mushrooms start to give up some liquid, approximately 4 to 5 minutes. Add the garlic and nutmeg and continue to cook for another 1 to 2 minutes. Sprinkle the flour over the mixture, stir to combine, and cook for 1 minute. Add the broth and simmer for 1 minute while whisking to smooth out lumps. Add the half-and-half and cook until the mixture thickens, whisking if there are still lumps, approximately 6 to 8 minutes.

Remove from heat and stir in the haricot verts and 2/3 cup of fried onions. Transfer mixture into a 9 x 13 baking dish. Top with the remaining 2/3 cup of fried onions. Place into the oven and bake until bubbly, approximately 15 minutes. Remove and serve immediately.

Make ahead tip: Cook the green beans and mushroom sauce. Mix the beans in the sauce but do not mix in the fried onions yet. Transfer to a baking dish and refrigerate overnight. When ready to bake, set the dish out on the counter for about 20 minutes to let it come to room temperature. If the mixture seems thick, add a little chicken stock or half-and-half to loosen the sauce. Mix in 2/3 cup of fried onions, top with the remaining onions, and bake.


Monday, November 21, 2016

Maple Candied Bacon

I decided to make some maple glazed bacon on a whim yesterday and didn't want to spend much time finding a recipe. I was hungry. This candied bacon recipe from The Chew caught my eye because it uses dijon mustard and apple cider vinegar for added flavor on top of brown sugar and maple syrup.

I only had a few slices of applewood smoked bacon (about 1/4 lb.), so I cut the ingredients down proportionately.

Ready for the oven

The bacon takes longer to cook because of the glaze. I only basted twice after 15 and 20 minutes and let them finish baking at 350° F for 30 minutes.
After 15 minutes

The bacon was cooked and crispy after 30 minutes, but still had a little bend after cooling completely. This is perfectly fine if served flat or chopped up.
After 30 minutes

But, I wanted these to be extra crispy so they can stand up in a glass or jar. I stuck them back in the oven for a few more minutes, so total cooking time ended up between 30-35 minutes.

I think this could bake at a higher temperature, like 400°, for a shorter time as long as you check them frequently to make sure the sugars and bacon aren't burning. These can go from crispy to burnt quickly.

Tip: If some bacon slices are thinner than others, take those out of the oven sooner so they don't burn before thicker slices are done.

You can make candied bacon with just brown sugar and maple syrup. But if a few more ingredients will add more flavor, why not use 'em? The dijon mustard becomes more subtle in flavor after the bacon cooks so it's like a secret ingredient. I used a tiny amount of cayenne pepper and didn't get any heat so I would definitely use more in the future.

My Rating (out of 5): 3.5

Saturday, November 19, 2016

Classic Moules in White Wine Sauce

I was inspired to make moules (i.e. mussels) at home after seeing a Geoffrey Zakarian recipe on The Kitchen. Mussels always seem like an impressive dish at restaurants and it's amazing that they are so easy, fast, and cheap to make at home. A 2 lb. bag of mussels is $7 or less, depending on where you live.

While the recipe is for moules frites, it doesn't include steps for making fries and just says to serve with fries. So, I've just made the mussels, sans frites, and serve with crusty bread instead. This sauce is SO tasty that you'll want to mop it all up with bread anyway.

This dish cooks ridiculously fast. The prep time takes longer than it does to cook it. On the show, they mention letting the mussels sit in a bowl of cold water twice before cooking, but this is not included in the prep time of the recipe on the site. I let them sit in cold water for about 30 minutes to let them release any sand. But, I don't repeat because I don't have the patience.

Check the mussels for any that are cracked or open and won't close after giving them a tap. These mussels are dead and should be discarded. Remove any fuzzy beards from the live mussels.

It's best to have all the prep done and ingredients measured out first. Once you start cooking, it's very quick so having everything ready to go makes life much easier.

Here's how things looked once I got cooking:
Softening shallots & garlic
Added white wine, salt, & pepper

Add cleaned mussels & cover
After 3 minutes
If there are any mussels that didn't open during cooking, throw those out as well because those aren't good either. Luckily, they all opened this time!

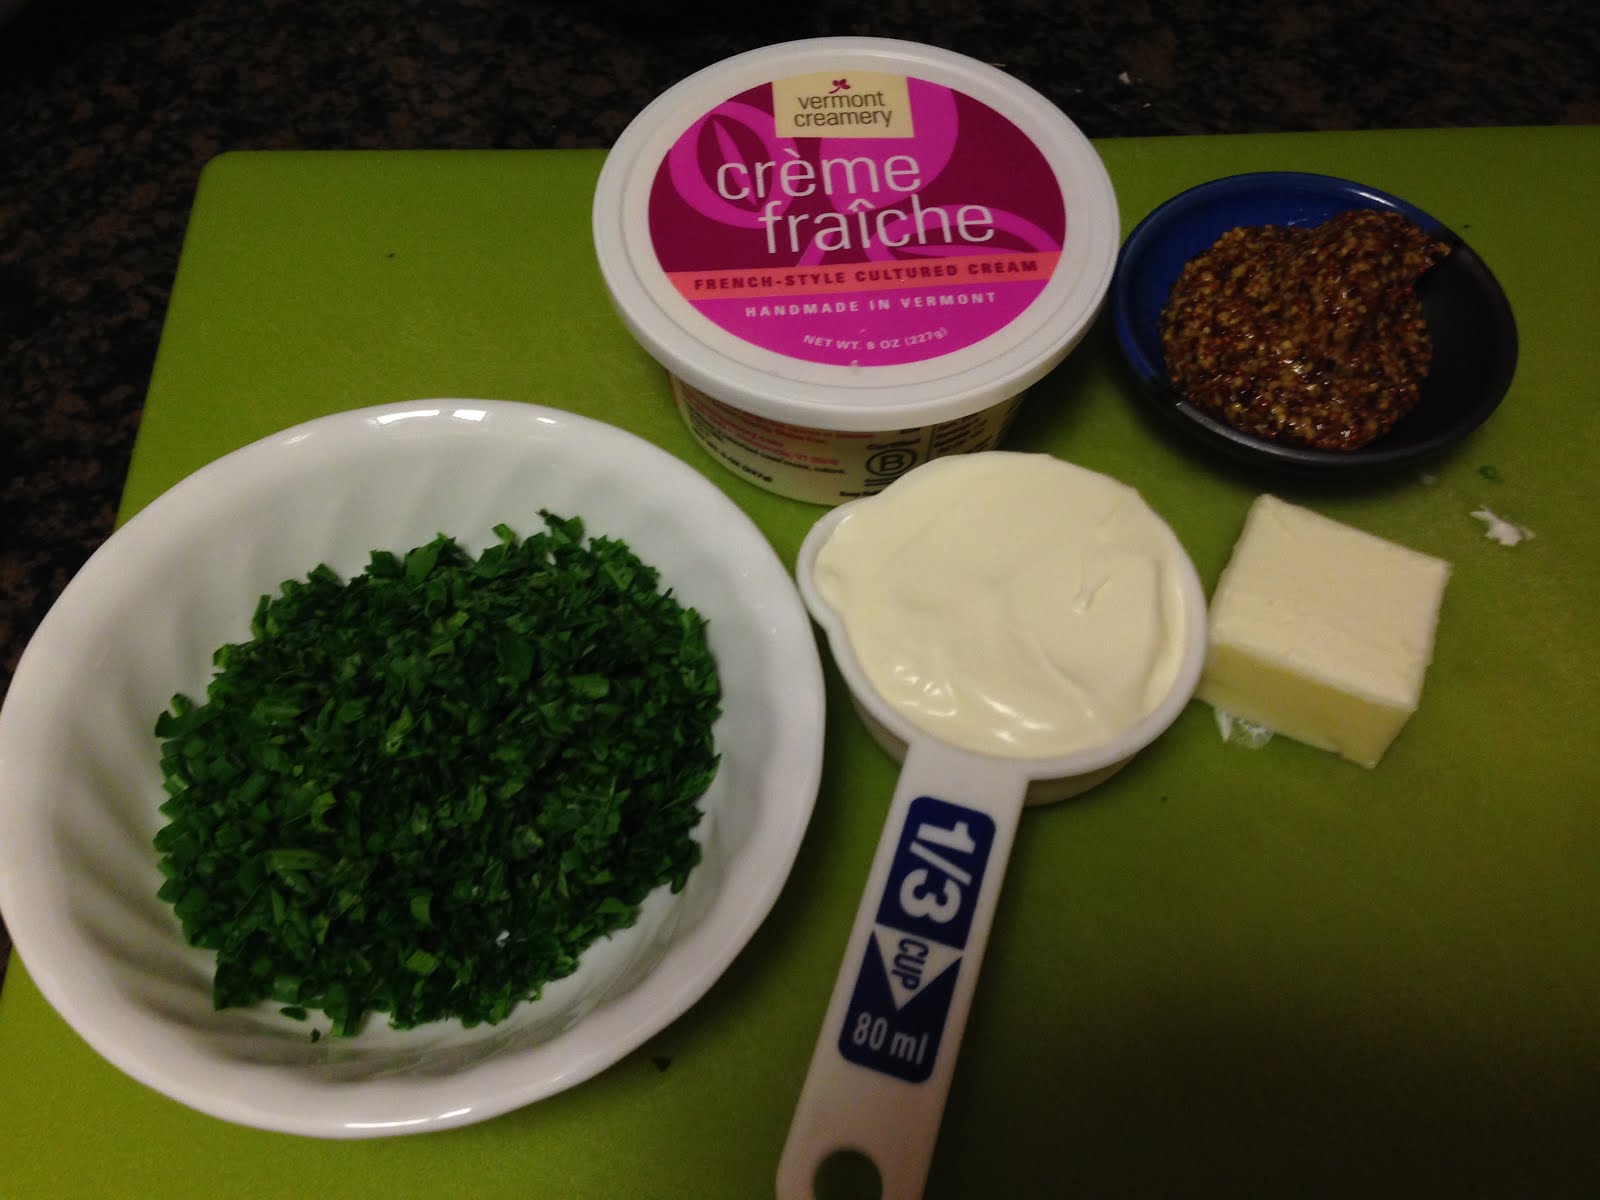
If I don't have creme fraîche, I've substituted with some heavy cream in the sauce. Here, I used creme fraîche.

I really like how the whole grain mustard adds just a bit of tang to the sauce and another depth of flavor.

As a main dish, this is really 2 servings. As an appetizer, it could work for 4. And don't forget the crusty bread!

My Rating (out of 5): 5